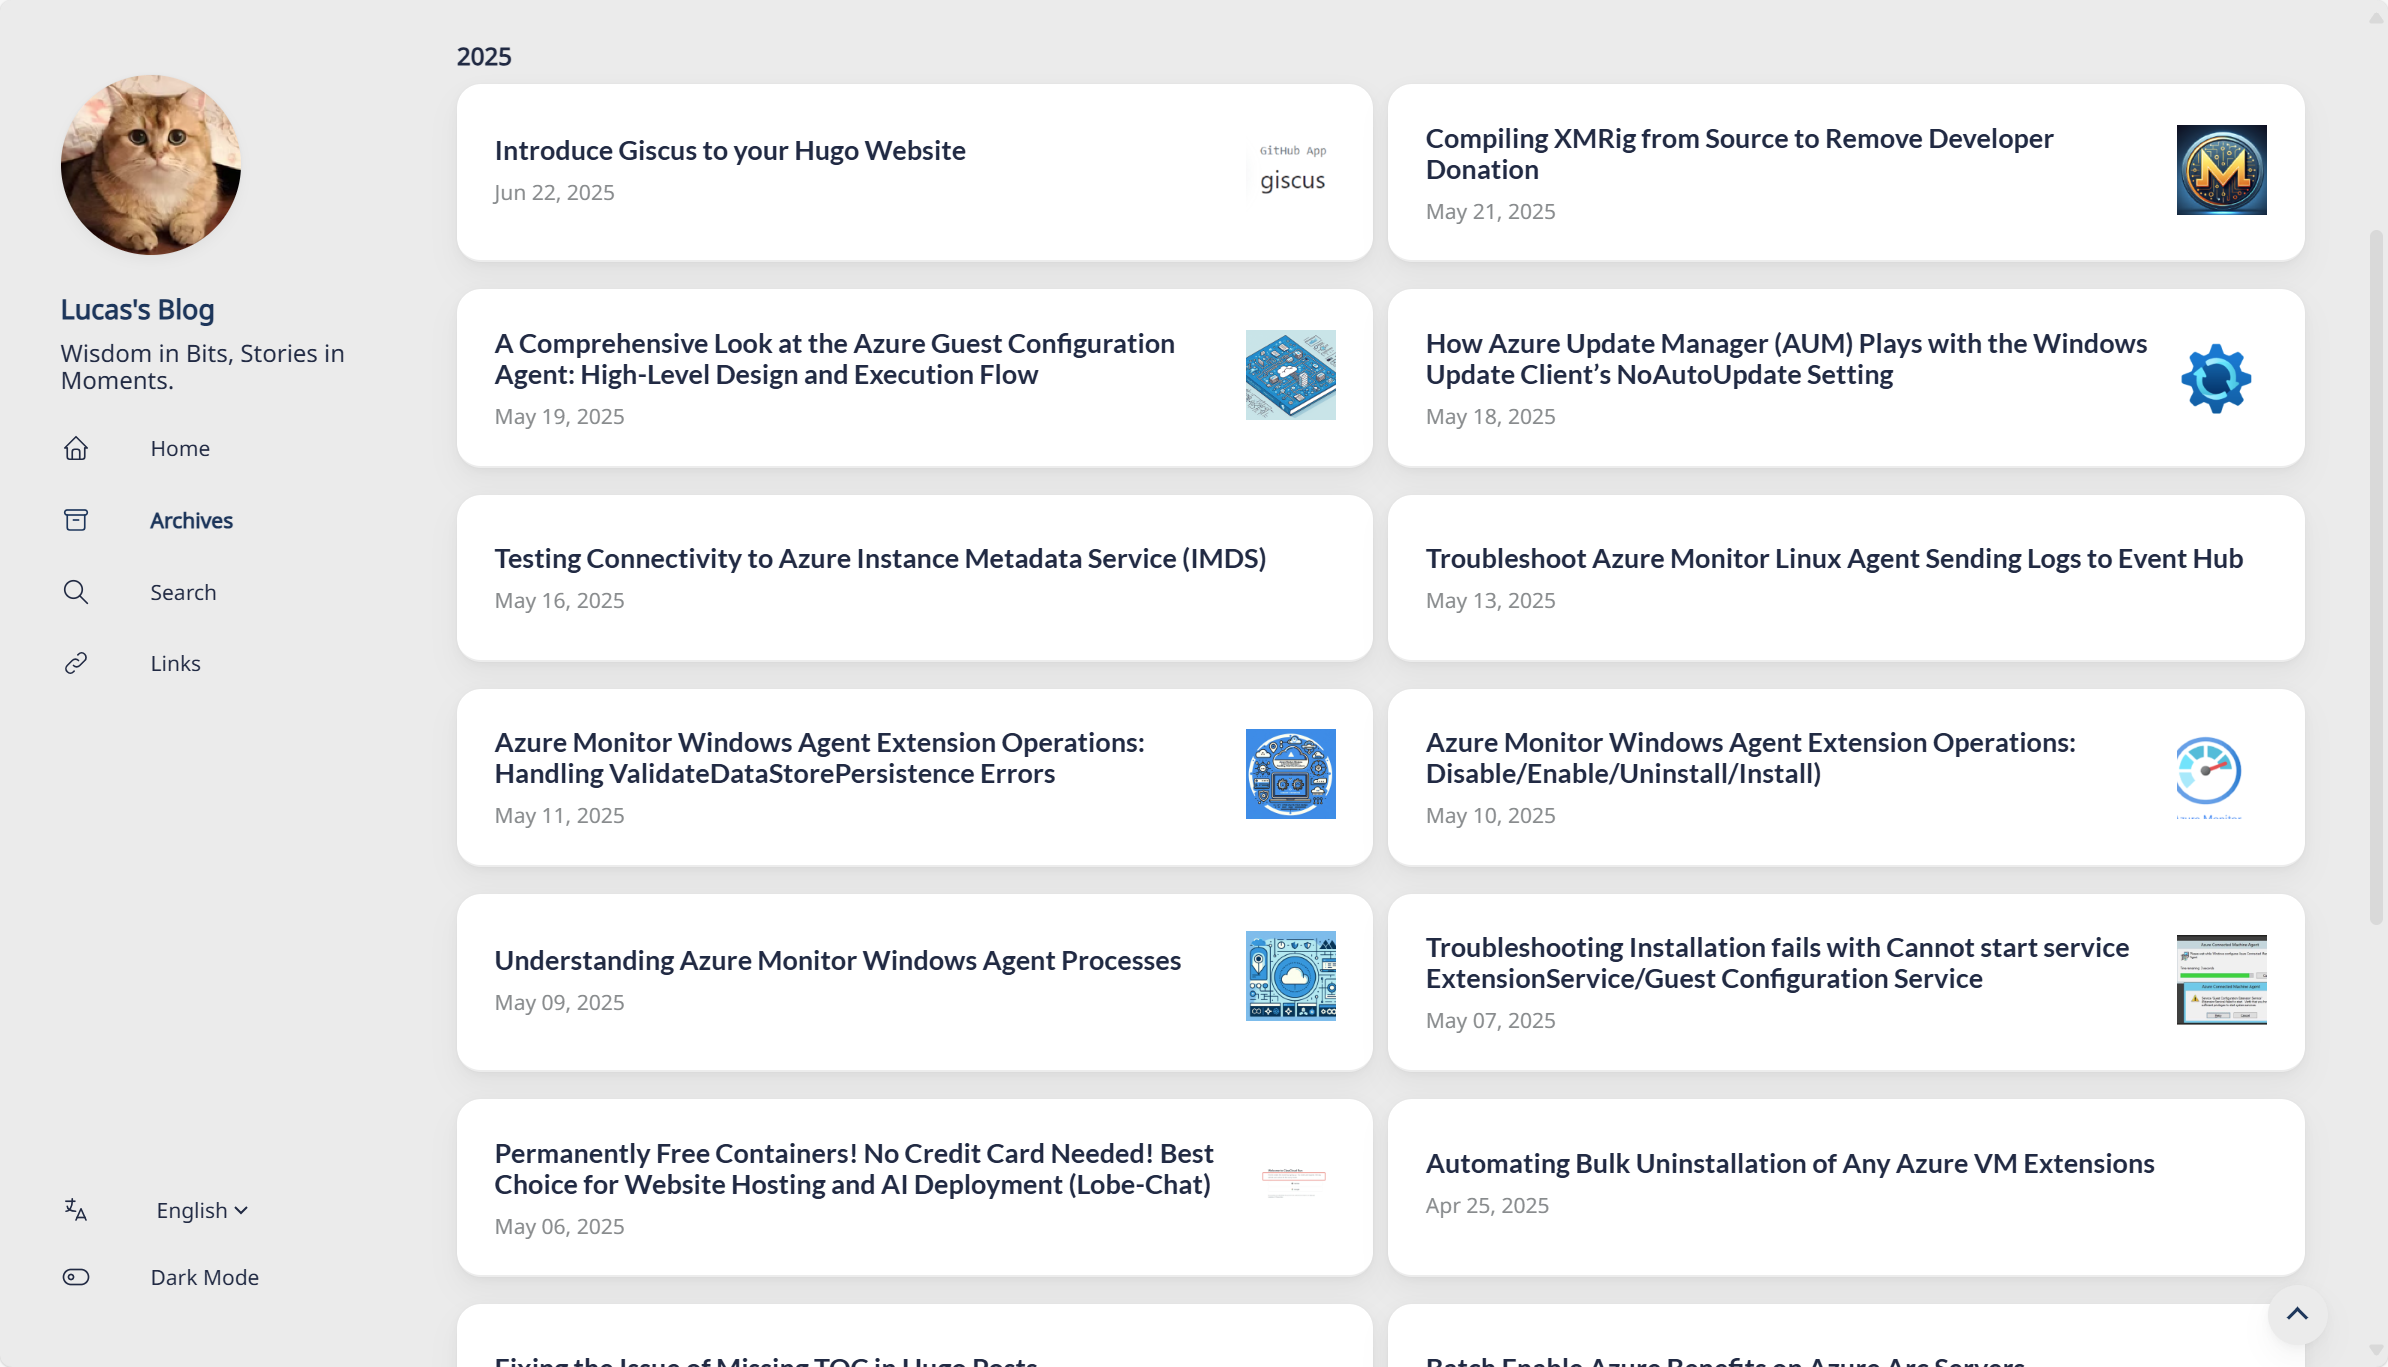
双栏归档页
原主题在大屏下的归档页面使用了单栏设计,这将会产生大量的空白占用页面并且不利于文章的查找,因此将其改为双栏则能够很好的利用大屏下的页面空间.
新建文件~\assets\scss\custom.scss, 写入以下内容:
 1
 2
 3
 4
 5
 6
 7
 8
 9
10
11
12
13
14
15
16
17
18
| /* 归档页面两栏 */
@media (min-width: 1024px) {
.article-list--compact {
display: grid;
grid-template-columns: 1fr 1fr;
background: none;
box-shadow: none;
gap: 1rem;
article {
background: var(--card-background);
border: none;
box-shadow: var(--shadow-l2);
margin-bottom: 8px;
border-radius: 16px;
}
}
}
|
代码块
代码块自定义高度,全局滚动条
原本的代码块默认有多少行展示多少行,含有长代码块的文章浏览器体验很差。 而且也不能简单只调整高度,否则左侧行号和右侧代码部分都会出现独立的滚动条。研究许久,下面是解决方案:
新建~\assets\scss\custom.scss,在文件最后加入以下内容
 1
 2
 3
 4
 5
 6
 7
 8
 9
10
11
12
13
14
15
16
17
18
19
20
21
22
23
24
25
26
27
28
29
30
31
32
33
34
35
| // =============================
// 代码块
// =============================
/* 自定义变量,想改高度改这里即可 */
$codeblock-max-height: 25em;
/* ① 把最外层 .highlight 作为“唯一”滚动容器 */
.highlight {
max-height: $codeblock-max-height;
overflow: auto; /* 同时控制 X / Y 两个方向 */
-webkit-overflow-scrolling: touch; /* 移动端惯性滚动 */
}
/* ② 关闭内部 pre / code 自己的滚动(否则会出现双滚动条) */
.highlight pre,
.highlight code,
.highlight .chroma {
overflow: visible !important; /* 覆盖 Stack 里对 pre 的 overflow-x:auto */
}
/* ③ 让行号用的表格按内容宽度自增,保证超宽时能触发 X 滚动 */
.lntable {
display: inline-table; /* 仍然保持表格特性但可随内容变宽 */
min-width: max-content;
border-spacing: 0;
}
/* ④ 禁止自动换行,超长行通过横向滚动处理 */
.lntd:last-child code,
.highlight code {
white-space: pre; /* 不折行 */
}
.lntd:first-child {
user-select: none; // 禁止选中行号
}
|
缩小代码块的字体大小
默认的在移动端UA下看起来实在是太大了😨,还是小一点比较好看😋
在~\assets\scss\custom.scss文件最后加入以下内容
 1
 2
 3
 4
 5
 6
 7
 8
 9
10
| /* 左列行号 */
.chroma .lntd, .chroma .lntd pre, .chroma .ln {
font-size: 14px;
font-family: var(--code-font-family);
}
/* 右列代码 */
.chroma code, .chroma pre {
font-size: 14px;
font-family: var(--code-font-family);
}
|
MacOS风格代码块
在 ~/themes/hugo-theme-stack/assets/scss/partials/layout/article.scss文件中找到 .highlight 部分并修改成如下:
1
2
3
4
5
6
7
8
| .highlight {
background-color: var(--pre-background-color);
padding: var(--card-padding);
position: relative;
border-radius: 10px;
max-width: 100% !important;
margin: 0 !important;
box-shadow: var(--shadow-l1) !important;
|
创建 ~/static/img/code-header.svg 文件:
1
2
3
4
5
| <svg xmlns="http://www.w3.org/2000/svg" version="1.1" x="0px" y="0px" width="450px" height="130px">
<ellipse cx="65" cy="65" rx="50" ry="52" stroke="rgb(220,60,54)" stroke-width="2" fill="rgb(237,108,96)"/>
<ellipse cx="225" cy="65" rx="50" ry="52" stroke="rgb(218,151,33)" stroke-width="2" fill="rgb(247,193,81)"/>
<ellipse cx="385" cy="65" rx="50" ry="52" stroke="rgb(27,161,37)" stroke-width="2" fill="rgb(100,200,86)"/>
</svg>
|
最后在 ~/assets/scss/custom.scss 添加代码块的样式:
 1
 2
 3
 4
 5
 6
 7
 8
 9
10
11
12
13
14
| // 为代码块顶部添加 macos 样式
.article-content {
.highlight:before {
content: "";
display: block;
background: url(/img/code-header.svg);
height: 25px;
width: 100%;
background-size: 52px;
background-repeat: no-repeat;
margin-top: -10px;
margin-bottom: 0;
}
}
|
外部链接后面会显示图标
显示效果:

在网站根目录新建~/layouts/_default/_markup/render-link.html,并填入
 1
 2
 3
 4
 5
 6
 7
 8
 9
10
11
| <a class="link" href="{{ .Destination | safeURL }}" {{ with .Title}} title="{{ . }}"
{{ end }}{{ if strings.HasPrefix .Destination "http" }} target="_blank" rel="noopener"
{{ end }}>{{ .Text | safeHTML }}</a>
{{ if strings.HasPrefix .Destination "http" }}
<span style="white-space: nowrap;"><svg width=".7em"
height=".7em" viewBox="0 0 21 21" xmlns="http://www.w3.org/2000/svg">
<path d="m13 3l3.293 3.293l-7 7l1.414 1.414l7-7L21 11V3z" fill="currentColor" />
<path d="M19 19H5V5h7l-2-2H5c-1.103 0-2 .897-2 2v14c0 1.103.897 2 2 2h14c1.103 0 2-.897 2-2v-5l-2-2v7z"
fill="currentColor">
</svg></span>
{{ end }}
|
更换字体
作者在 ~/themes/hugo-theme-stack/layouts/partials/footer/components/custom-font.html 中进行了字体的自定义:
 1
 2
 3
 4
 5
 6
 7
 8
 9
10
11
| <script>
(function () {
const customFont = document.createElement('link');
customFont.href = "https://fonts.googleapis.com/css2?family=Lato:wght@300;400;700&display=swap";
customFont.type = "text/css";
customFont.rel = "stylesheet";
document.head.appendChild(customFont);
}());
</script>
|
他使用的字体是 Lato ,这个字体不支持中文,因此最终呈现出来的字体是平平无奇的微软雅黑(其实是作者放置的默认选项)。
更改字体的方式有几种:
- 使用在线字体;
- 下载字体CSS并引入;
- 使用正常PC都会有的字体(如微软雅黑、仿宋、楷体等)。
我决定使用在线字体,首先是因为在线字体的样式比较丰富,其次是字体CSS并没有那么好找……
- 科学上网 去到 Google fonts ,找到满意的字体
- 点击
Get font
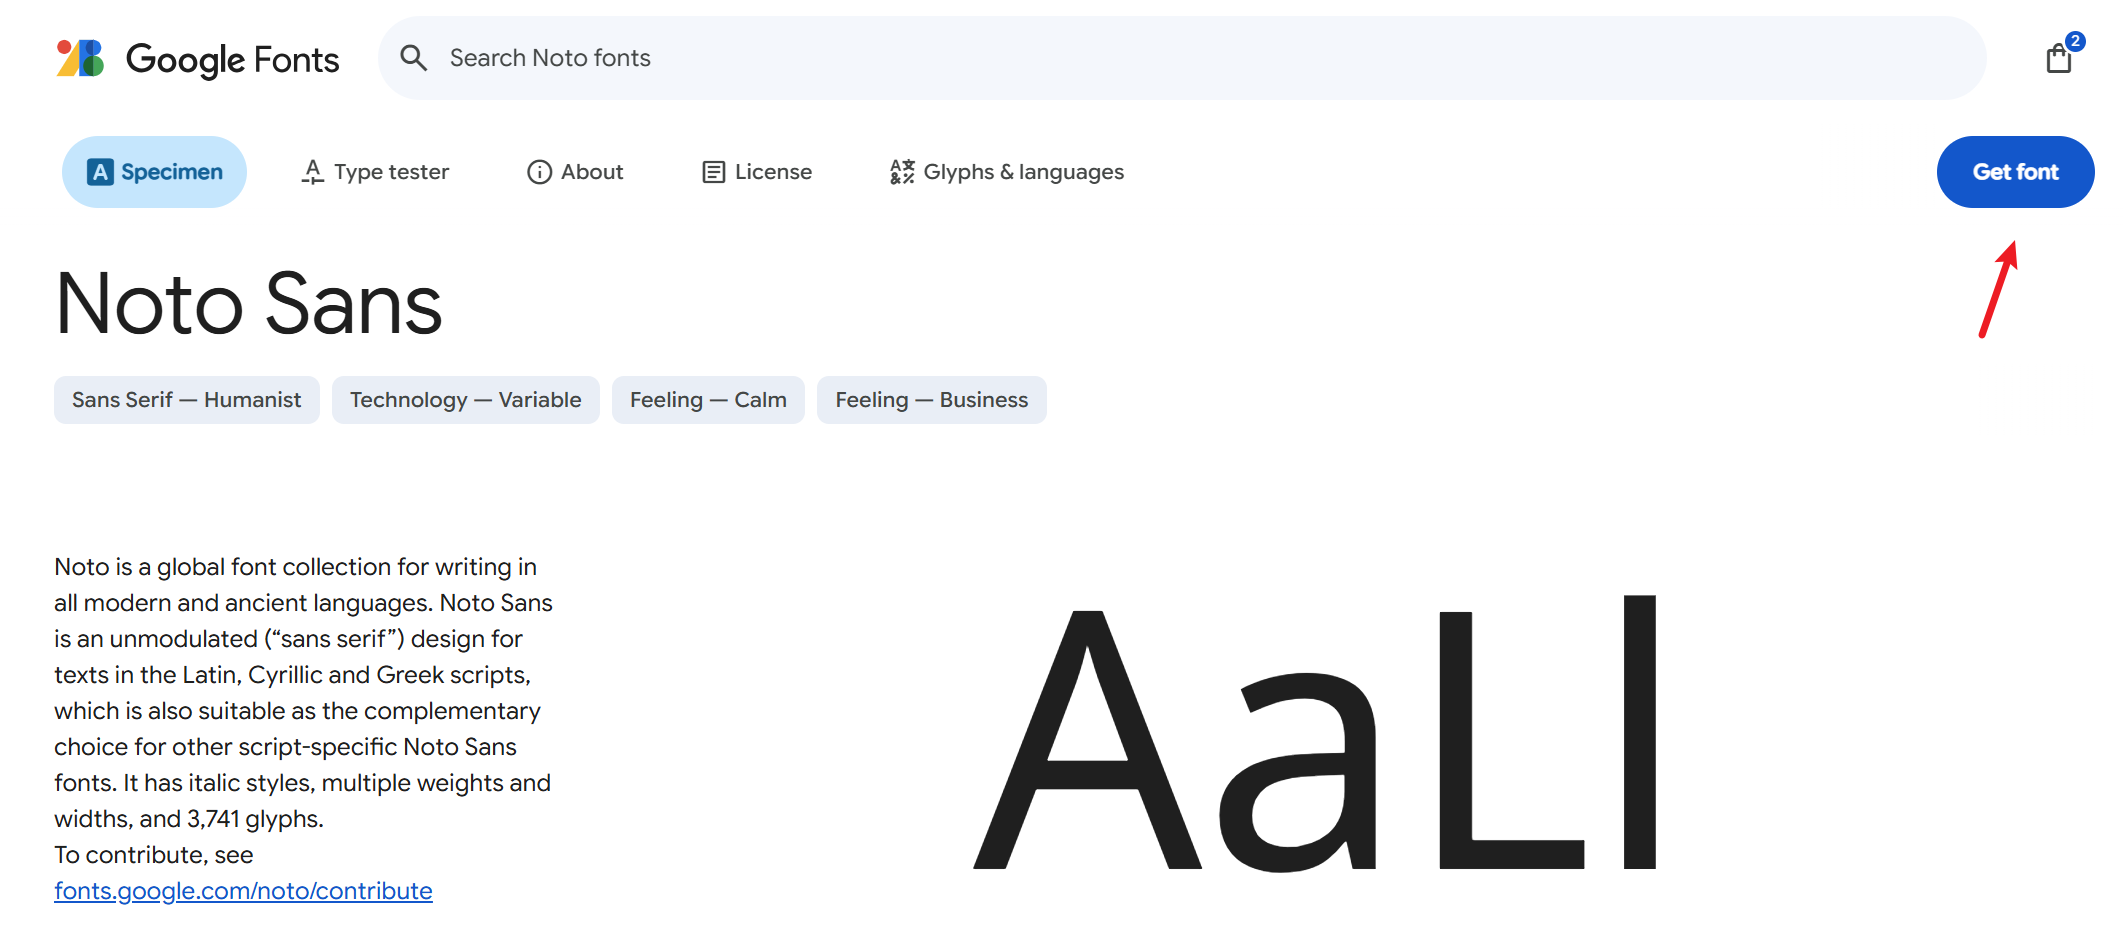
- 可选择选择自己想要的字体,选择 Get embeded code
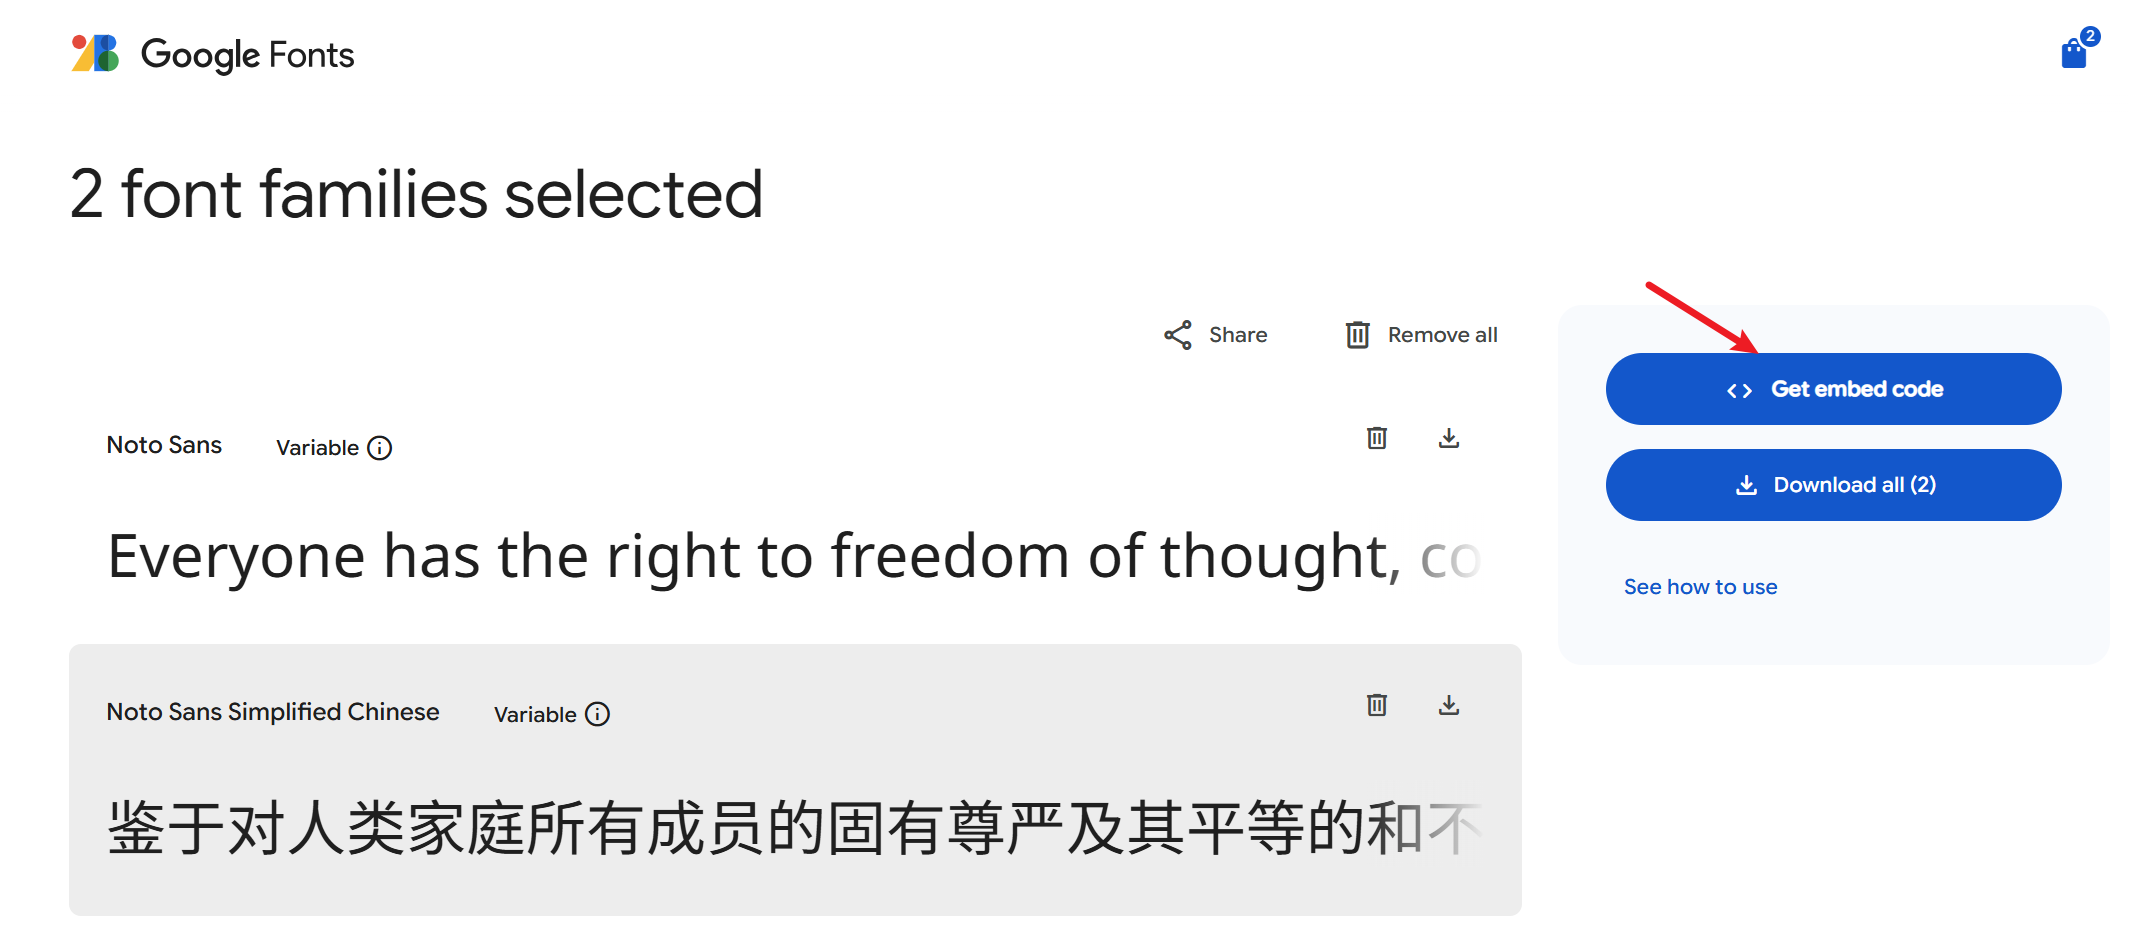
- 可以在左侧调整字体的属性,比如Weight等。最后点击右侧第一个Copy Code
- 新建文件
~\layouts\partials\head\custom.html, 并把刚才复制的内容黏贴。这样字体即导入完毕。1
2
3
| <link rel="preconnect" href="https://fonts.googleapis.com">
<link rel="preconnect" href="https://fonts.gstatic.com" crossorigin>
<link href="https://fonts.googleapis.com/css2?family=Noto+Sans+SC&family=Noto+Sans:ital@0;1&display=swap" rel="stylesheet">
|
- 现在开始修改样式让文章使用我们的导入的字体。新建文件
~\assets\scss\custom.scss, 在末尾添加如下代码1
2
3
4
| // 文章页字体
body, .article-content {
font-family: 'Noto Sans', 'Noto Sans SC', sans-serif;
}
|
- 可选更换网站其他部分字体
1
2
3
4
5
6
7
8
9
10
11
12
13
14
15
| // 文章页字体
body, .article-content {
font-family: 'Noto Sans', 'Noto Sans SC', sans-serif;
}
// 标题字体
body, .article-title {
font-family: "LXGW WenKai Screen", sans-serif;
}
// 首页字体
body, .article-page {
font-family: "HarmonyOS_Regular", sans-serif;
}
|
增加返回顶部按钮
效果:
- 新建
~/layouts/partials/footer/components/script.html,增加如下代码 1
2
3
4
5
6
7
8
9
10
11
12
13
14
15
16
17
18
19
20
21
22
23
24
25
26
27
28
29
30
31
| <!-- Add back to top button -->
<script>
function backToTop() {
document.documentElement.scrollIntoView({
behavior: 'smooth',
})
}
window.onload = function () {
let scrollTop =
this.document.documentElement.scrollTop || this.document.body.scrollTop
let totopBtn = this.document.getElementById('back-to-top')
if (scrollTop > 0) {
totopBtn.style.display = 'inline'
} else {
totopBtn.style.display = 'none'
}
}
window.onscroll = function () {
let scrollTop =
this.document.documentElement.scrollTop || this.document.body.scrollTop
let totopBtn = this.document.getElementById('back-to-top')
if (scrollTop < 200) {
totopBtn.style.display = 'none'
} else {
totopBtn.style.display = 'inline'
totopBtn.addEventListener('click', backToTop, false)
}
}
</script>
|
- 新建
~/layouts/partials/footer/custom.html, 将~/themes/hugo-theme-stack/layouts/partials/footer/custom.html里的内容全部复制过去,并在最后增加如下代码。改了一下按钮的颜色(background-color 和 border-color),跟主题色系统一。 1
2
3
4
5
6
7
8
9
10
11
12
13
14
15
16
17
18
19
20
21
22
23
24
25
26
27
28
29
30
31
32
33
34
35
36
37
38
39
40
41
42
43
44
45
46
47
48
49
50
51
52
53
54
55
56
57
58
59
60
61
62
63
64
65
66
67
68
69
70
71
72
73
74
75
76
77
78
79
| <!-- Add back to top button -->
<a href="#" id="back-to-top" title="返回顶部"></a>
<!--返回顶部 CSS -->
<style>
#back-to-top {
display: none;
position: fixed;
bottom: 5px;
right: 15px;
width: 40px; /* Reduced size */
height: 40px; /* Reduced size */
border-radius: 50%; /* Circular button for modern look */
background-color: var(--body-background);
box-shadow: var(--shadow-l2);
font-size: 20px; /* Adjusted for smaller button */
text-align: center;
line-height: 38px; /* Center align arrow */
cursor: pointer;
transition:
transform 0.3s ease,
background-color 0.3s ease; /* Added smooth interaction */
}
#back-to-top:before {
content: "";
display: inline-block;
position: relative;
transform: rotate(135deg);
height: 8px; /* Reduced size */
width: 8px; /* Reduced size */
border-width: 0 0 2px 2px;
border-color: var(--back-to-top-color);
border-style: solid;
}
#back-to-top:hover {
transform: scale(1.1); /* Slightly larger on hover */
background-color: var(--accent-background); /* Optional hover effect */
}
#back-to-top:hover:before {
border-color: var(--accent-color); /* Change arrow color on hover */
}
/* Responsive styles */
@media screen and (max-width: 768px) {
#back-to-top {
bottom: 5px;
right: var(--container-padding);
width: 30px; /* Slightly smaller for mobile */
height: 30px;
font-size: 16px;
line-height: 32px;
}
}
@media screen and (min-width: 1024px) {
#back-to-top {
bottom: 10px;
right: 20px;
}
}
@media screen and (min-width: 1280px) {
#back-to-top {
bottom: 15px;
right: 25px;
}
}
@media screen and (min-width: 1536px) {
#back-to-top {
bottom: 15px;
right: 25px;
/* visibility: hidden; */
}
}
</style>
|
接入Giscus评论系统
详情请参考 这里
给首页的分类卡增加对应的颜色条和条目数量
效果预览:
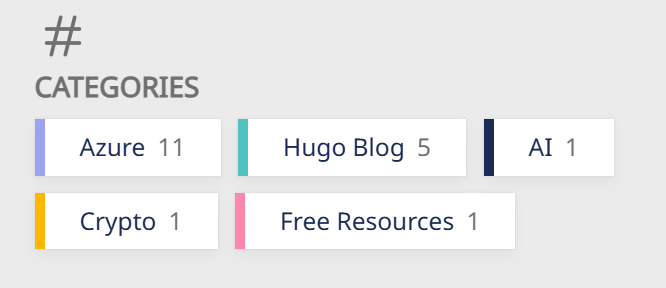
首先需要在分类卡的_index.md文件里定义每个类别的背景色,这个之后会用到。好看的配色我一般会去 Color Hunt
找找灵感,需要微调的话可以参考 Color Hex
。
格式如下:
1
2
3
4
5
6
7
8
| ---
# content/categories/life/_index.md
title: 生活日常
# Badge style
style:
background: "#d09daa"
color: "#fff"
---
|
在~/themes/hugo-theme-stack/assets/scss/partials/article.scss里找到.article-category并替换成以下代码:
 1
 2
 3
 4
 5
 6
 7
 8
 9
10
11
12
13
14
15
16
17
18
19
| .article-category {
display: flex;
flex-wrap: wrap;
gap: 10px;
a {
background: var(--card-background);
box-shadow: var(--shadow-l1);
border-radius: var(--category-border-radius);
padding: 8px 20px;
color: var(--card-text-color-main);
font-size: 1.4rem;
transition: box-shadow 0.3s ease;
&:hover {
box-shadow: var(--shadow-l2);
}
}
}
|
在~/themes/hugo-theme-stack/assets/scss/partials/widgets.scss增加如下代码:
1
2
3
4
5
6
7
8
9
10
11
12
13
14
15
16
17
18
19
20
21
22
23
24
25
26
27
| /* Category widget */
.category {
.category-label {
display: flex;
flex-wrap: wrap;
gap: 10px;
a {
border-left: 6px solid; // Set border for category widget
background: var(--card-background);
box-shadow: var(--shadow-l1);
border-radius: var(--category-border-radius);
padding: 8px 20px;
color: var(--card-text-color-main);
font-size: 1.4rem;
transition: box-shadow 0.3s ease;
&:hover {
box-shadow: var(--shadow-l2);
}
}
}
.category-count {
margin-left: 7px;
color: var(--body-text-color);
}
}
|
最后在~/themes/hugo-theme-stack/layouts/partials/widget/categories.html将Section的内容替换为如下。其中我加上了{{ .Count }}来显示分类的条目数量。
1
2
3
4
5
6
7
8
9
10
11
12
13
14
15
| <section class="widget category">
<div class="widget-icon">
{{ partial "helper/icon" "categories" }}
</div>
<h2 class="widget-title section-title">{{ T "widget.categoriesCloud.title" }}</h2>
<div class="category-label">
{{ range first $limit $context.Site.Taxonomies.categories.ByCount }}
<a href="{{ .Page.RelPermalink }}" class="font_size_{{ .Count }}"
style="border-left-color: {{ .Page.Params.style.background }}; filter:saturate(1.7);">
{{ .Page.Title }}<span class="category-count">{{ .Count }}</span>
</a>
{{ end }}
</div>
</section>
|
由于我设置的背景色都偏灰,但颜色条我想让它亮眼一些,所以这里加了个让颜色饱和度更高的filter:saturate(1.7);,不需要的话可以删掉。
首页欢迎横幅
效果:

在 ~/themes/hugo-theme-stack/layouts/index.html 的 <section class="article-list"> 前添加以下代码:
1
2
3
4
5
6
7
8
9
10
11
| <!-- 首页欢迎字幅 -->
<div class="welcome">
<p style="font-size: 2rem; text-align: center; font-weight: bold">
<span class="shake">👋</span>
<span class="jump-text1" > Welcome</span>
<span class="jump-text2"> To </span>
<span class="jump-text3" style="color:#e99312"> L</span><span class="jump-text4" style="color:#e99312">u</span><span class="jump-text5" style="color:#e99312">c</span><span class="jump-text6" style="color:#e99312">a</span><span class="jump-text7" style="color:#e99312">s</span><span class="jump-text8" style="color:#e99312">'s</span>
<span class="jump-text9" style="color:#e99312">Blog</span>
</p>
</div>
<!-- 首页欢迎字幅 -->
|
在 ~/assets/scss/custom.scss 中加入以下代码:
 1
 2
 3
 4
 5
 6
 7
 8
 9
10
11
12
13
14
15
16
17
18
19
20
21
22
23
24
25
26
27
28
29
30
31
32
33
34
35
36
37
38
39
40
41
42
43
44
45
46
47
48
49
50
51
52
53
54
55
56
57
58
59
60
61
62
63
64
65
66
67
68
69
70
71
72
73
74
75
76
77
78
79
80
81
82
83
84
85
86
87
88
89
90
91
92
93
94
95
96
97
98
99
100
101
102
103
104
105
106
107
108
| //首页欢迎板块样式
.welcome {
color: var(--card-text-color-main);
background: var(--card-background);
box-shadow: var(--shadow-l2);
border-radius: 30px;
display: inline-block;
}
// 👋emoji实现摆动效果
.shake {
display: inline-block;
animation: shake 1s;
animation-duration: 1s;
animation-timing-function: ease;
animation-delay: 0s;
animation-iteration-count: 1;
animation-direction: normal;
animation-fill-mode: none;
animation-play-state: running;
animation-name: shake;
animation-timeline: auto;
animation-range-start: normal;
animation-range-end: normal;
animation-delay: 2s;
@keyframes shake {
0% {
transform: rotate(0);
}
25% {
transform: rotate(45deg) scale(1.2);
}
50% {
transform: rotate(0) scale(1.2);
}
75% {
transform: rotate(45deg) scale(1.2);
}
100% {
transform: rotate(0);
}
}
}
// 实现字符跳动动画
.jump-text1 {
display: inline-block;
animation: jump 0.5s 1;
}
.jump-text2 {
display: inline-block;
animation: jump 0.5s 1;
animation-delay: 0.1s;
}
.jump-text3 {
display: inline-block;
animation: jump 0.5s 1;
animation-delay: 0.2s;
}
.jump-text4 {
display: inline-block;
animation: jump 0.5s 1;
animation-delay: 0.3s;
}
.jump-text5 {
display: inline-block;
animation: jump 0.5s 1;
animation-delay: 0.4s;
}
.jump-text6 {
display: inline-block;
animation: jump 0.5s 1;
animation-delay: 0.5s;
}
.jump-text7 {
display: inline-block;
animation: jump 0.5s 1;
animation-delay: 0.6s;
}
.jump-text8 {
display: inline-block;
animation: jump 0.5s 1;
animation-delay: 0.7s;
}
.jump-text9 {
display: inline-block;
animation: jump 0.5s 1;
animation-delay: 0.9s;
}
@keyframes jump {
0% {
transform: translateY(0);
}
50% {
transform: translateY(-20px);
}
100% {
transform: translateY(0);
}
}
|
顶部加载进度条
效果:

新建~/layouts/partials/footer/custom.html并在最后加入以下内容:
1
2
3
4
5
6
7
8
9
10
11
12
13
14
15
16
17
18
19
| <!-- layouts/partials/footer/custom.html -->
<script
src="https://cdn.jsdelivr.net/gh/zhixuan2333/gh-blog@v0.1.0/js/nprogress.min.js"
integrity="sha384-bHDlAEUFxsRI7JfULv3DTpL2IXbbgn4JHQJibgo5iiXSK6Iu8muwqHANhun74Cqg"
crossorigin="anonymous"
></script>
<link
rel="stylesheet"
href="https://cdn.jsdelivr.net/gh/zhixuan2333/gh-blog@v0.1.0/css/nprogress.css"
integrity="sha384-KJyhr2syt5+4M9Pz5dipCvTrtvOmLk/olWVdfhAp858UCa64Ia5GFpTN7+G4BWpE"
crossorigin="anonymous"
/>
<script>
NProgress.start();
document.addEventListener("readystatechange", () => {
if (document.readyState === "interactive") NProgress.inc(0.8);
if (document.readyState === "complete") NProgress.done();
});
</script>
|
More
之后还有其他装修项目的话,我会持续更新在这里!
参考